Breakfast, Brunch, Lunch & Dinner Recipe Ideas | Happy Mother's Day!

Recipes in this Video
Brown Butter Apple Muffins are a delightful American treat that combines the rich, nutty flavor of browned butter with the sweetness of fresh apples. This dish is often enjoyed during the fall, when apples are in season, and is perfect for breakfast or as a snack. The technique of browning the butter adds depth and complexity to the flavor, making these muffins a favorite among home bakers. Today, variations can be found across many bakeries and households, often incorporating different spices or nuts for added texture.
Ingredients
- ●butter
- ●apples
- ●all-purpose flour
- ●baking powder
- ●baking soda
- ●salt
- ●cinnamon
- ●nutmeg
- ●sugar
- ●brown sugar
- ●eggs
- ●vanilla extract
- ●milk
Instructions
- 1Preheat the oven to 350°F (175°C) and line a muffin tin with paper liners.
- 2Melt the butter in a saucepan over medium heat until it turns golden brown and has a nutty aroma, about 5-7 minutes.
- 3Remove the browned butter from heat and let it cool slightly.
- 4In a mixing bowl, combine the flour, baking powder, baking soda, salt, cinnamon, and nutmeg.
- 5In another bowl, whisk together the brown sugar, sugar, eggs, vanilla extract, and milk until smooth.
- 6Pour the browned butter into the egg mixture and mix well.
- 7Gradually add the dry ingredients to the wet ingredients, stirring until just combined.
- 8Fold in the diced apples gently until evenly distributed.
- 9Spoon the batter into the prepared muffin tin, filling each cup about 2/3 full.
- 10Bake for 18-20 minutes, or until a toothpick inserted in the center comes out clean.
- 11Allow the muffins to cool in the pan for 5 minutes before transferring them to a wire rack to cool completely.
Ingredient Alternatives
butter
Healthier: coconut oil
Cheaper: margarine
Coconut oil offers a healthier fat option while margarine is often less expensive.
all-purpose flour
Healthier: whole wheat flour
Cheaper: self-rising flour
Whole wheat flour adds fiber and nutrients; self-rising flour is often cheaper and convenient.
milk
Healthier: almond milk
Cheaper: water
Almond milk is lower in calories; water is a cost-effective substitute.
Techniques
Equipment
Also Known As
Ingredients
- ●3 ripe bananas, mashed
- ●1/3 cup melted butter
- ●1 teaspoon baking soda
- ●Pinch of salt
- ●3/4 cup sugar
- ●1 large egg, beaten
- ●1 teaspoon vanilla extract
- ●1 cup all-purpose flour
Instructions
- 1Preheat your oven to 350°F (175°C).
- 2In a mixing bowl, mash the ripe bananas with a fork until smooth.
- 3Stir the melted butter into the mashed bananas.
- 4Mix in the baking soda and salt.
- 5Add the sugar, beaten egg, and vanilla extract, and mix well.
- 6Stir in the flour until just combined; do not overmix.
- 7Line a muffin tin with paper liners or grease it lightly.
- 8Pour the batter into the muffin cups, filling each about 2/3 full.
- 9Bake in the preheated oven for 18-20 minutes, or until a toothpick inserted into the center comes out clean.
- 10Let the muffins cool in the pan for a few minutes before transferring them to a wire rack to cool completely.
Equipment
Ingredients
- ●2 cups all-purpose flour
- ●1/4 cup granulated sugar
- ●1 tbsp baking powder
- ●1/2 tsp salt
- ●1 tsp ground cinnamon
- ●1 cup milk
- ●1/4 cup vegetable oil
- ●2 large eggs
- ●1 tsp vanilla extract
- ●1/2 cup brown sugar
- ●1 tbsp ground cinnamon (for filling)
- ●1/4 cup unsalted butter (melted, for filling)
- ●1 cup powdered sugar (for icing)
- ●2 tbsp milk (for icing)
- ●1/2 tsp vanilla extract (for icing)
Instructions
- 1In a large bowl, whisk together the flour, granulated sugar, baking powder, salt, and ground cinnamon.
- 2In another bowl, mix the milk, vegetable oil, eggs, and vanilla extract until well combined.
- 3Pour the wet ingredients into the dry ingredients and stir until just combined; do not overmix.
- 4In a small bowl, combine the brown sugar and ground cinnamon for the filling.
- 5Preheat your waffle iron according to the manufacturer's instructions.
- 6Pour a ladleful of the batter onto the preheated waffle iron, then sprinkle a layer of the brown sugar and cinnamon mixture over the batter.
- 7Close the waffle iron and cook until the waffles are golden brown and cooked through, about 4-5 minutes.
- 8Remove the waffles and keep them warm while you repeat with the remaining batter and filling.
- 9In a small bowl, whisk together the powdered sugar, milk, and vanilla extract to make the icing.
- 10Drizzle the icing over the warm cinnamon roll waffles before serving.
Equipment
Chilaquiles are a traditional Mexican dish often served for breakfast or brunch. They consist of fried tortilla pieces topped with salsa and various garnishes. The dish is versatile, allowing for a variety of toppings and sauces, making it a popular choice for using up leftover tortillas. Chilaquiles reflect the resourcefulness of Mexican cuisine, transforming simple ingredients into a flavorful meal.
Ingredients
- ●tortillas
- ●salsa
- ●cheese
- ●sour cream
- ●onion
- ●cilantro
- ●avocado
- ●egg
Instructions
- 1Cut tortillas into triangles and fry until crispy.
- 2Prepare your choice of salsa (red or green).
- 3In a large skillet, combine fried tortillas and salsa over medium heat.
- 4Cook until tortillas are softened but still crispy.
- 5Top with crumbled cheese, diced onion, and chopped cilantro.
- 6Serve with a dollop of sour cream or Greek yogurt and slices of avocado.
Ingredient Alternatives
tortillas
Healthier: whole grain tortillas
Cheaper: store-brand tortillas
Whole grain tortillas offer more fiber, while store-brand options can be more budget-friendly.
salsa
Healthier: homemade salsa
Cheaper: canned salsa
Homemade salsa can be fresher and healthier, while canned options are often less expensive.
cheese
Healthier: low-fat cheese
Cheaper: processed cheese
Low-fat cheese reduces calories, while processed cheese can be more affordable.
sour cream
Healthier: Greek yogurt
Cheaper: sour cream
Greek yogurt is a healthier alternative with more protein.
Techniques
Equipment
Also Known As
Huevos Rancheros is a traditional Mexican breakfast dish that reflects the country's rich culinary heritage. It typically features eggs served on tortillas with a variety of toppings, showcasing local ingredients like beans and salsa. The dish is often enjoyed in the morning but can be served at any time of the day, highlighting its versatility and popularity across Mexico and beyond.
Ingredients
- ●tortillas
- ●eggs
- ●black beans
- ●tomato sauce
- ●onion
- ●jalapeño
- ●cilantro
- ●avocado
- ●lime
- ●cheese
Instructions
- 1Heat a skillet over medium heat.
- 2Warm the tortillas in the skillet until pliable.
- 3In a separate pan, cook the eggs sunny-side up.
- 4In the same skillet, sauté onions and jalapeños until soft.
- 5Add tomato sauce and simmer for a few minutes.
- 6Layer the warm tortillas on plates.
- 7Top each tortilla with black beans, a fried egg, and the tomato sauce.
- 8Garnish with cilantro, avocado slices, and cheese.
- 9Serve with lime wedges on the side.
Ingredient Alternatives
tortillas
Healthier: whole grain tortillas
Cheaper: store-brand tortillas
Whole grain tortillas provide more fiber, while store-brand options can be more budget-friendly.
black beans
Healthier: kidney beans
Cheaper: pinto beans
Kidney beans are nutritious, while pinto beans are often less expensive.
cheese
Healthier: low-fat cheese
Cheaper: processed cheese
Low-fat cheese reduces calories, while processed cheese can be more affordable.
Techniques
Equipment
Also Known As
Ingredients
- ●1 lb breakfast sausage
- ●6 large eggs
- ●2 cups milk
- ●1 tsp salt
- ●1/2 tsp black pepper
- ●1/2 tsp garlic powder
- ●1/2 tsp onion powder
- ●4 cups cubed bread
- ●2 cups shredded cheddar cheese
- ●1/2 cup chopped green onions
Instructions
- 1Preheat the oven to 350°F (175°C).
- 2In a large skillet, cook the breakfast sausage over medium heat until browned. Drain excess fat.
- 3In a large bowl, whisk together the eggs, milk, salt, pepper, garlic powder, and onion powder.
- 4Add the cubed bread to the egg mixture and stir to combine.
- 5Fold in the cooked sausage, shredded cheddar cheese, and chopped green onions.
- 6Pour the mixture into a greased 9x13 inch baking dish.
- 7Bake in the preheated oven for 30-35 minutes, or until the casserole is set and golden brown on top.
- 8Let it cool for a few minutes before slicing and serving.
Equipment
Originating from the central regions of Mexico, Enchiladas Suizas are a beloved variation of traditional enchiladas, characterized by their creamy green sauce and melted cheese. The name 'Suizas' refers to the Swiss influence on the dish, particularly the use of cream and cheese. Traditionally served at celebrations, these enchiladas have gained popularity beyond Mexico, often found in Mexican restaurants worldwide, showcasing the country's rich culinary diversity.
Ingredients
- ●corn tortillas
- ●cooked chicken
- ●green salsa
- ●heavy cream
- ●cheese
- ●onion
- ●cilantro
- ●garlic
- ●lime juice
- ●salt
- ●pepper
Instructions
- 1Prepare the green salsa by blending tomatillos, cilantro, garlic, lime juice, and salt until smooth.
- 2Heat a skillet over medium heat and warm the corn tortillas until pliable, about 30 seconds per side.
- 3Spread a layer of green salsa on the bottom of a baking dish.
- 4Fill each tortilla with cooked chicken and roll tightly, placing seam-side down in the baking dish.
- 5Pour remaining green salsa over the enchiladas, ensuring they are well covered.
- 6Drizzle heavy cream over the top of the enchiladas.
- 7Sprinkle cheese evenly over the enchiladas.
- 8Bake in a preheated oven at 350°F (175°C) for 20-25 minutes, until cheese is melted and bubbly.
- 9Garnish with chopped onion and cilantro before serving.
Ingredient Alternatives
heavy cream
Healthier: Greek yogurt
Cheaper: milk + cornstarch
Greek yogurt reduces calories while maintaining creaminess
cheese
Healthier: nutritional yeast
Cheaper: processed cheese
Nutritional yeast is a dairy-free alternative with a cheesy flavor.
green salsa
Healthier: homemade tomatillo sauce
Cheaper: canned green salsa
Homemade sauce can be fresher and tailored to taste.
cooked chicken
Healthier: tofu
Cheaper: shredded rotisserie chicken
Tofu is a plant-based protein alternative.
Techniques
Equipment
Also Known As
Pot roast is a classic American comfort food, often associated with family gatherings and Sunday dinners. It showcases the technique of braising, where tougher cuts of meat become tender through slow cooking. This dish has roots in various European cuisines, reflecting the immigrant influences on American cooking. It is typically served with root vegetables, making it a hearty and satisfying meal.
Ingredients
- ●beef chuck roast
- ●carrots
- ●potatoes
- ●onions
- ●beef broth
- ●garlic
- ●herbs
- ●salt
- ●pepper
Instructions
- 1Preheat the oven to 300°F (150°C).
- 2Season the beef roast with salt and pepper.
- 3In a large skillet, sear the roast on all sides until browned.
- 4Transfer the roast to a roasting pan.
- 5Add chopped carrots, potatoes, onions, and garlic around the roast.
- 6Pour beef broth over the roast and vegetables.
- 7Sprinkle herbs on top.
- 8Cover the pan with a lid or foil.
- 9Bake in the oven for several hours until the meat is tender.
- 10Check occasionally and add more broth if needed.
- 11Once done, let it rest before slicing.
- 12Serve with the vegetables and pan juices.
Ingredient Alternatives
beef chuck roast
Healthier: lean beef cuts
Cheaper: pork shoulder
Lean beef cuts are lower in fat, while pork shoulder is often more affordable.
potatoes
Healthier: sweet potatoes
Cheaper: instant mashed potatoes
Sweet potatoes are more nutritious, while instant mashed potatoes save time and money.
Techniques
Equipment
Also Known As
Baked Ziti is a beloved dish in Italian-American cuisine, often served at family gatherings and celebrations. Its roots can be traced back to Southern Italy, where pasta dishes are a staple. This comforting casserole showcases the harmony of pasta, cheese, and tomato sauce, making it a favorite for potlucks and weeknight dinners alike. Today, variations abound, with some adding vegetables or different meats, reflecting personal tastes and regional influences.
Ingredients
- ●ziti pasta
- ●marinara sauce
- ●ricotta cheese
- ●mozzarella cheese
- ●Parmesan cheese
- ●ground beef
- ●onion
- ●garlic
- ●olive oil
- ●basil
- ●oregano
- ●salt
- ●black pepper
- ●egg
- ●fresh parsley
Instructions
- 1Preheat the oven to 375°F (190°C).
- 2Cook ziti pasta in boiling salted water until al dente, about 8-10 minutes.
- 3Drain the pasta and set aside.
- 4Heat olive oil in a skillet over medium heat, add chopped onion and garlic, and sauté until softened, about 3-4 minutes.
- 5Add ground beef to the skillet, cooking until browned, about 5-7 minutes.
- 6Stir in marinara sauce, basil, oregano, salt, and black pepper; simmer for 5 minutes.
- 7In a bowl, mix ricotta cheese, egg, parsley, and a pinch of salt until combined.
- 8In a baking dish, layer half of the cooked ziti, followed by half of the meat sauce, and half of the ricotta mixture.
- 9Sprinkle half of the mozzarella cheese on top, then repeat the layers with the remaining ingredients.
- 10Cover the dish with foil and bake for 25 minutes.
- 11Remove the foil and bake for an additional 15 minutes, until the cheese is bubbly and golden.
- 12Let cool for 5 minutes before serving.
Ingredient Alternatives
ricotta cheese
Healthier: cottage cheese
Cheaper: cream cheese
Cottage cheese is lower in fat and provides a similar texture.
ground beef
Healthier: ground turkey
Cheaper: ground pork
Ground turkey is leaner, while ground pork can be less expensive.
mozzarella cheese
Healthier: part-skim mozzarella
Cheaper: provolone cheese
Part-skim mozzarella reduces calories while provolone can be more affordable.
Parmesan cheese
Healthier: nutritional yeast
Cheaper: grated Pecorino Romano
Nutritional yeast is dairy-free and adds a cheesy flavor.
Techniques
Equipment
Also Known As
Ingredients
- ●1 pound spaghetti
- ●1/2 cup unsalted butter
- ●1/2 cup olive oil
- ●1/2 cup grated Parmesan cheese
- ●1/2 cup heavy cream
- ●1/4 cup chopped fresh parsley
- ●1/4 teaspoon red pepper flakes
- ●1 teaspoon garlic powder
- ●1 teaspoon onion powder
- ●Salt to taste
- ●Black pepper to taste
Instructions
- 1Cook the spaghetti according to package instructions until al dente. Drain and set aside.
- 2In a large skillet, melt the butter and olive oil over medium heat.
- 3Add the garlic powder, onion powder, red pepper flakes, salt, and black pepper to the skillet. Stir to combine.
- 4Pour in the heavy cream and bring to a simmer, stirring frequently.
- 5Add the cooked spaghetti to the skillet and toss to coat in the sauce.
- 6Stir in the grated Parmesan cheese until melted and well combined.
- 7Remove from heat and sprinkle with chopped parsley.
- 8Serve immediately, garnished with additional Parmesan if desired.
Equipment
Ingredients
- ●1 1/2 cups all-purpose flour
- ●1 tsp baking powder
- ●1/2 tsp salt
- ●1/2 cup unsalted butter, softened
- ●1 cup granulated sugar
- ●2 large eggs
- ●1/2 cup milk
- ●1/4 cup fresh lemon juice
- ●1 tbsp lemon zest
- ●1/2 tsp vanilla extract
- ●1 cup powdered sugar
- ●2 tbsp fresh lemon juice (for glaze)
Instructions
- 1Preheat your oven to 350°F (175°C).
- 2Grease and flour a 9x5 inch loaf pan.
- 3In a medium bowl, whisk together the flour, baking powder, and salt. Set aside.
- 4In a large bowl, cream together the softened butter and granulated sugar until light and fluffy.
- 5Add the eggs one at a time, mixing well after each addition.
- 6Stir in the milk, lemon juice, lemon zest, and vanilla extract until well combined.
- 7Gradually add the dry ingredients to the wet ingredients, mixing until just combined.
- 8Pour the batter into the prepared loaf pan and smooth the top.
- 9Bake in the preheated oven for 50-60 minutes, or until a toothpick inserted into the center comes out clean.
- 10While the loaf is baking, prepare the glaze by mixing the powdered sugar and lemon juice in a small bowl until smooth.
- 11Once the loaf is done baking, let it cool in the pan for 10 minutes before transferring it to a wire rack to cool completely.
- 12Drizzle the lemon glaze over the cooled loaf before slicing and serving.
Equipment
Similar American Videos
(24 videos)
Batch Prepped SLOW COOKER RECIPES for an easier week
moon + magnolia

Honey Mustard Chicken Recipe
Jen Cooking
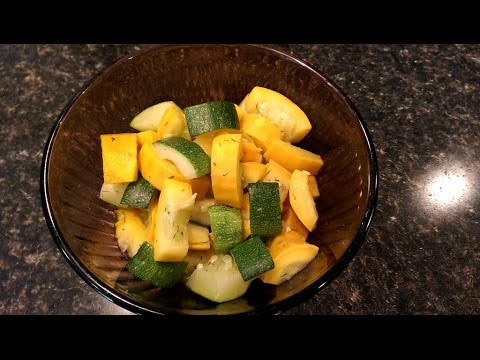
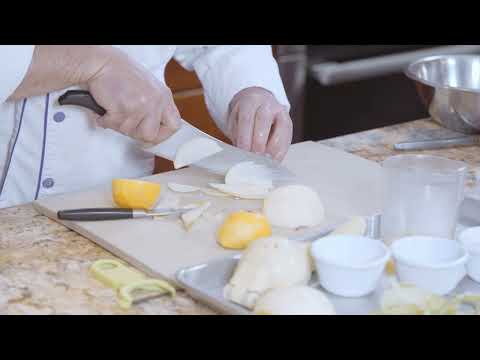
Steamed Zucchini - Bravo Charlie's Episode 23
Charlie Moore

How to make MACARONI SALAD by Kelly Henry #macaronisalad #pastarecipes #veggierecipes
Kelly's Kuisine

Dorito Taco Salad -- Throwback Video Series
Southern Country Living

Sausage Hash Brown Breakfast Casserole
Smokin' & Grillin with AB

Apple Fritter Doughnuts
Laura in the Kitchen

Crab Bisque
Dirty Spoons
Apple Cranberry Pecan Salad
Arabesque Media
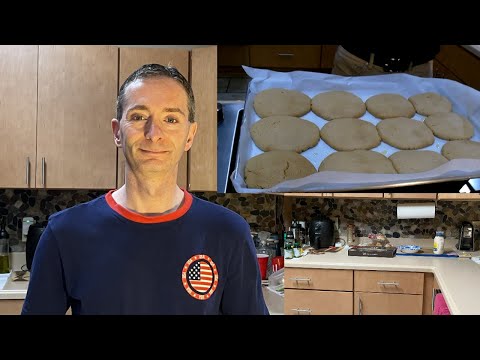
Peanut Butter Cookies
Omar Tellow

Pineapple Upside Down Cake | New Year Party Recipe | By Ashley Derick MacDonald | For Cuisine Canvas
Cuisine Canvas

Tuna Noodle Casserole - Food Wishes
Food Wishes

Boston Cream Pie
Preppy Kitchen

Southern Fried Chicken
Smokin' & Grillin with AB

Professional Baker Teaches You How To Make CHOCOLATE CHIP COOKIES!
Oh Yum with Anna Olson

Smoked Shotgun Shells
Meat Church BBQ

Broccoli Cheese Soup
Preppy Kitchen

Broccoli Cheese Soup
Preppy Kitchen

10 Recipes To Sweeten The Holiday Season
Scrumdiddlyumptious

Potato Salad
J. Kenji López-Alt

Peach Cobbler
Preppy Kitchen

5 Classic American Desserts You Must Try at Home! 🇺🇸🍰 #delicious_delights #dessert
Delicious Delights

7 Best Kids Lunch Box Recipes By Recipes Of The World
Recipes of the world

Mousse à la pêche par Pierre-Dominique Cécillon pour Larousse Cuisine
LarousseCuisine
Similar Desserts From Other Cuisines
(24 videos)
6 Crazy Easy NO-BAKE Desserts with Just 3 Ingredients (So Fun & Delicious!) | Summer Recipes
Patterson Family Home
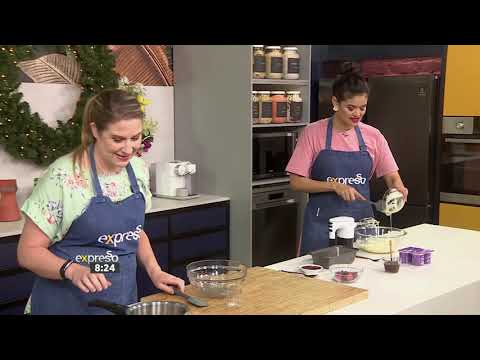
Recipe: Summer Berry Terrine (CLOVER)
ExpressoRecipes

German Desserts - 9 Delicious German Desserts That You Need To Try!
German Recipes by All Tastes German

Tiramisu
Preppy Kitchen

Riz au lait - saveur d’enfance - au lait végétal -
Mimagusta

{Recette Omnicuiseur} Riz au lait
Le Pays des Gourmandises
Recette culte : Riz au lait de l'Ami Jean - 750g
750g
RECETTE RIZ AU LAIT
Saad Fedda

~RIZ AU LAIT vanille ~ dessert allégé en sucre inratable |Recettes & diététique
Recettes & Diététique

Recette Riz au lait Gastronomique
Allez on cuisine

#1àZ : MON RIZ AU LAIT
Xavier Pincemin
Riz au lait au Cookeo
Lili Cuisine

BEIGNETS FRITS Recette facile - Fait maison
kado cuisine

Gâteau au yaourt - 10 leçons pour le réussir
Julie Andrieu - Chaîne officielle
Gâteau au yaourt en 1 minute . Bon et moelleux. Recette facile et rapide
Les délices de Maha

RECETTE DE CLAFOUTIS AUX CERISES ULTRA MOELLEUX 🍒 / RECETTE FACILE / cherry clafoutis كلفوتي ناجح
Zahra Inspire La Cuisine

recette TARTE TATIN / tarte Tatin recipe (English subs)
Les plaisirs sucrés d'Antoine

Tarte tatin revisitée : pommes caramélisées au cidre, pâte sucrée, chantilly, et cristaux de cidre
Les Desserts de Denis

Dacquoise - Recette facile par Chef Sylvain
Chef Sylvain - Vive la pâtisserie !

♡• RECETTE COQUES DE MACARONS FACILE ET INRATABLE •♡
L'atelier de Roxane

Macarons Express : Parfaits en 22 Min Sans Croûtage
Patis Coach

Les macarons de Noël - faciles et inratables
Quand Margot pâtisse

Macarons aux framboises - Simple mais irrésistible !
Chef Sylvain - Vive la pâtisserie !

Le VRAI mille feuille
🌍La Toqué Family 🍴